If everything is working well for you, there's not necessarily any good reason to update your ELRS version. However, if a new feature is released or a bug fix for a bug that's bothering you, then you'll want to know how to update!
Note: Major versions of ELRS do not have backwards compatibility, so whilst 3.6.3 and 3.6.2 are compatible, 4.0.0 and 3.6.3 are not compatible. That means if you're looking to upgrade to 4.0.0, then you'll have to do that on your transmitter and then across your whole fleet.
Note: this article covers the steps for upgrading a standard ELRS receiver or transmitter, some very small quads such as micro whoops may be running an SPI ELRS receiver instead of a serial receiver, these cannot be upgraded in this way. Instead, the ELRS version is bundled with Betaflight and therefore involves a separate process for updating - and you may need to wait for the manufacturer to release a new firmware version. This is just another reason that I love the BetaFPV Air65 and Air75 whoops - because they have a "proper" serial receiver on board!
If you're ready to get started, go ahead and download ExpressLRS Configurator (or if you prefer, you can use the Web interface).
Updating your Transmitter
Whatever you're flashing, you'll need to tell ExpressLRS Configurator what version of ELRS you want to use, in this guide I'll be using 4.0.0. You'll then need to tell it what hardware you're writing to. I'll be updating my Radiomaster Boxer Crush's internal module.
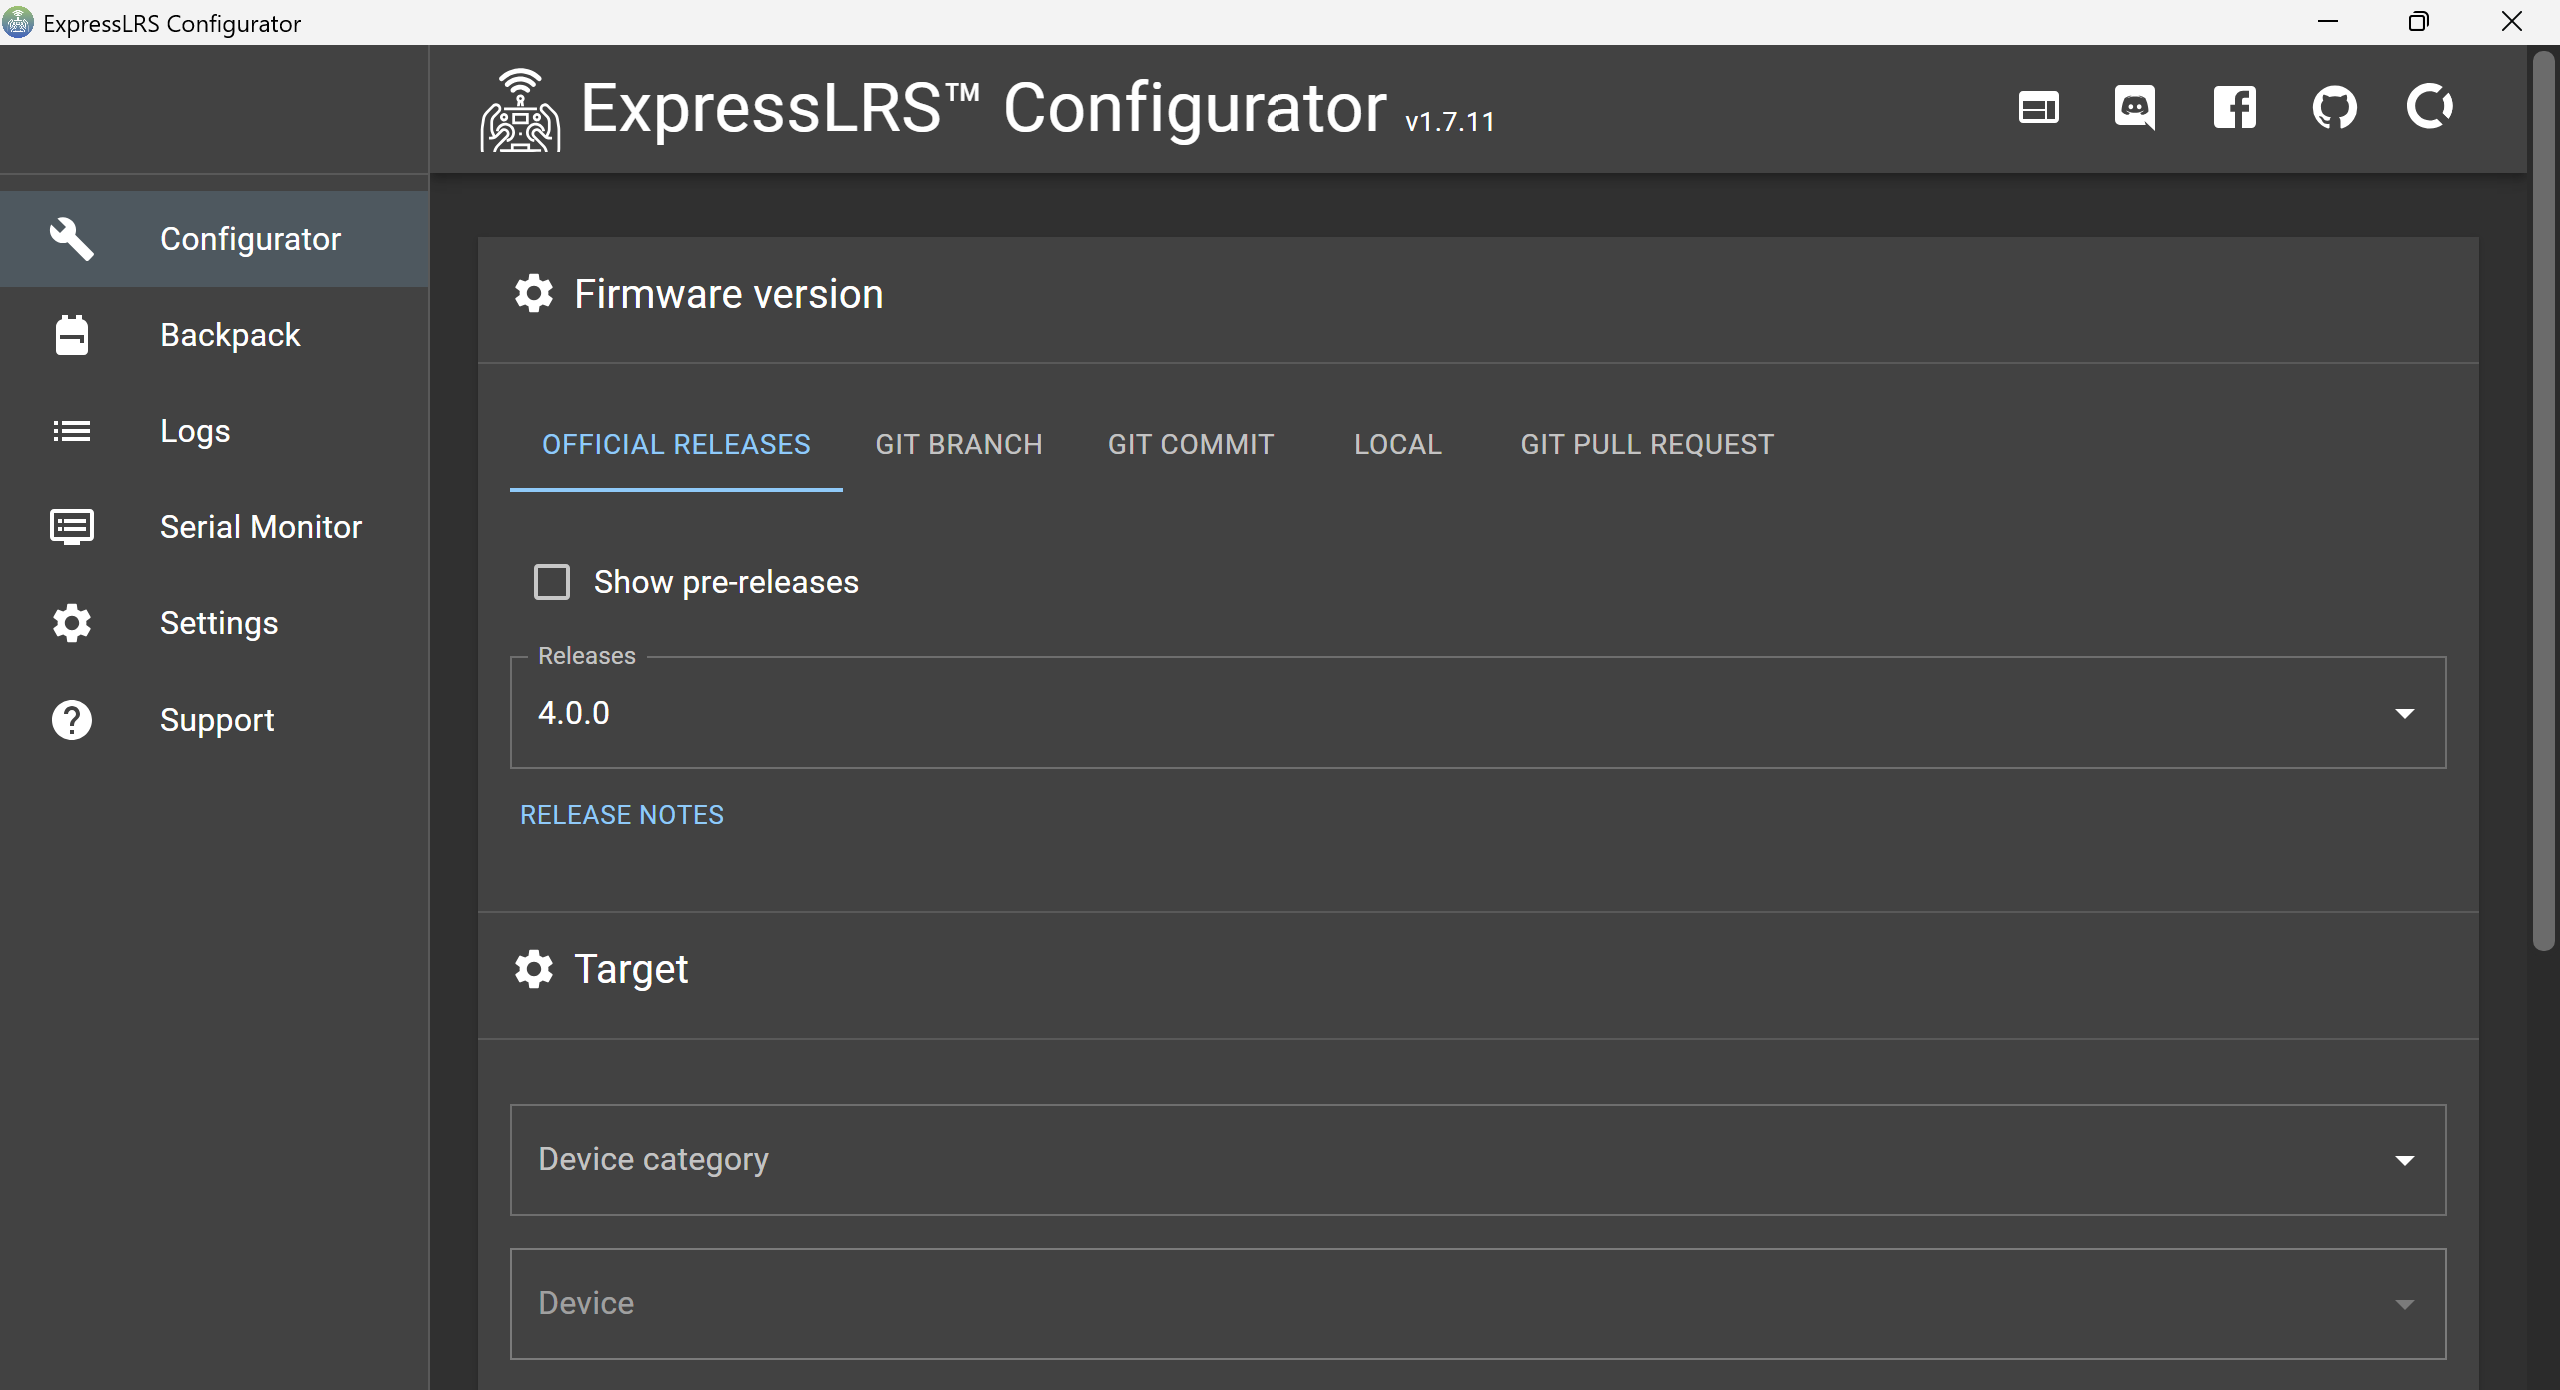
So for me, I'll set "Release" to 4.0.0. I'll set "Device Category" to "RadioMaster 2.4GHz" and for "Device", I'll use "RadioMaster Boxer Internal 2.4GHz TX".
For flashing method you have several options: EdgeTX Passthrough, UART (serial), or Wi-Fi. Wherever possible I personally use Wi-Fi, as I find it easier and more reliable. It also allows you to perform a "Build" and "Flash" as separate steps, which I like as it allows you to check that everything is working before you bother powering up your quad. That's less important when working with stable versions, but if you're working with pre-release versions or non-standard versions of ELRS, then it's a nice thing to be able to do.
For your transmitter you'll need to download the LUA script too, and write that to the transmitter's SD card - but we'll get to that. For now, just download the file and keep it somewhere convenient.
Next up, Configurator will ask you whether you want LBT or ISM. Your system will work as long as you select the same option for both the transmitter and your receiver. You may be required to tick one of these boxes to remain compliant to regulatory requirements in your country.
ISM is the "standard" option and stands for "Industrial, Scientific and Medical". It is a reference to the ISM radio bands, which are internationally reserved for a range of low power uses. Whereas LBT stands for "Listen Before Talk" and is an option which requires the device to listen to the frequency before it transmits, the intention is to minimise disruption and interference for other users - in the EU and UK, you may be required to use LBT. This option will also limit your power output to 100mW, again for regulatory reasons.
I leave all decisions about regulatory requirements up to you.
One option you definitely should select is a Binding Phrase. This phrase will prevent your transmitter from binding to someone else's quad, which is really useful if you fly with other remote pilots.
It's important to note that your bind phrase is not a security feature, although you will often hear people refer to it as a "password" or security feature. It is simply a convenience to simplify binding and prevent your transmitter unintentionally binding to someone else's quad. Now there are secure alternatives to ELRS that do have bind security, but these are outside of the scope of this article. To quote ExpressLRS themselves:
"We recommend using a unique phrase with at least 8 alpha-numeric characters. The best candidate is your Pilot Handle. This phrase need not be complicated or super-secret as it isn't a password or encryption key."
You can still override your Binding Phrase later on without rewriting your firmware if you need to change your phrase.
To automatically build and then flash your device over Wi-Fi, your computer will need to be connected to the internet and connected to the device's Wi-Fi connection. That'll work just fine if your internet is wired and then you connect to the transmitter's Wi-Fi at the same time. Personally, I just build and flash as two separate steps, so it's not a problem.
At this point you can ignore the "Wi-Fi Device Selection", as we're going to do it manually. Just hit "Build". If you're building a stable release, it should take less than 30 seconds to build (building a local version will take much longer if you're running non-standard ELRS versions).
Once building is complete, an explorer window will pop up with your compiled ELRS file! For my Boxer Crush, this is called "firmware.bin".
Before you continue, you should backup the models on your transmitter - and you can drop the LUA file on there at the same time too. To do this, connect your transmitter to your PC via USB, and select "USB Storage (SD)". You can find your existing models under the "Models" folder of course. Once you've backed those up you need to upload the ELRS.lua file to "Scripts\Tools\" - and remove the old copy.
Once you've done that you can enable your transmitter's Wi-Fi, to do that select: SYS → ExpressLRS → WiFi Connectivity → Enable WiFi. The transmitter will then just say "WiFi Running... [X]".
Note: SYS button not working? Disconnect your USB cable.
Once WiFi is running, you can connect to the transmitter from your laptop (or mobile phone!) as a new WiFi network will be available "ExpressLRS TX" - the default password is "expresslrs". When you connect to this WiFi network your browser should open automatically and take you to: http://10.0.0.1/ but it might not, so navigate there manually if it doesn't.
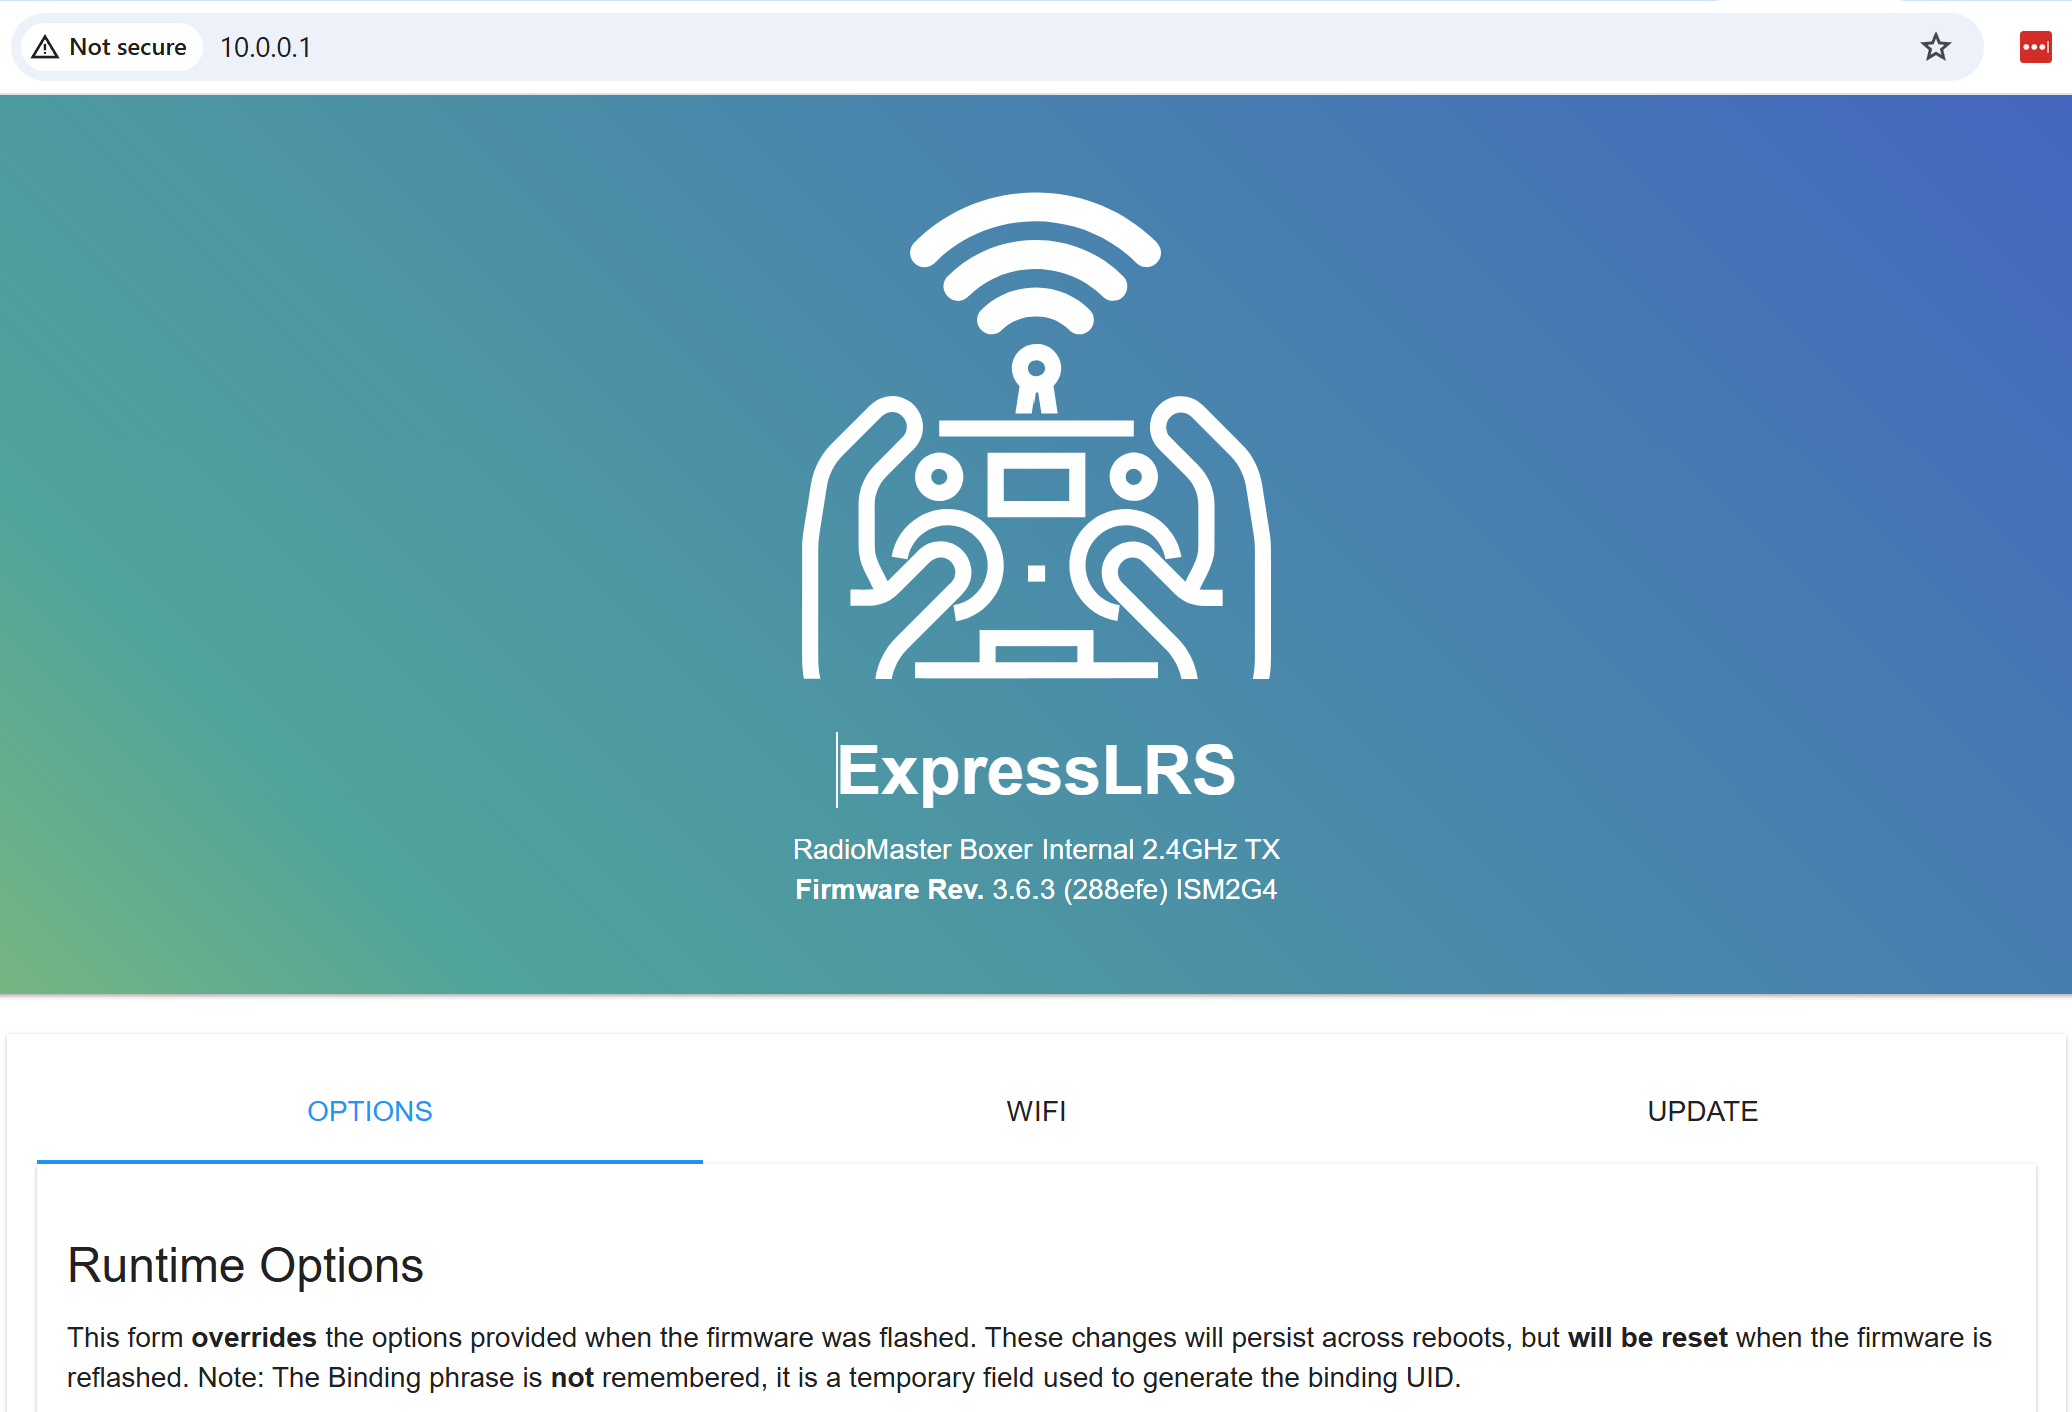
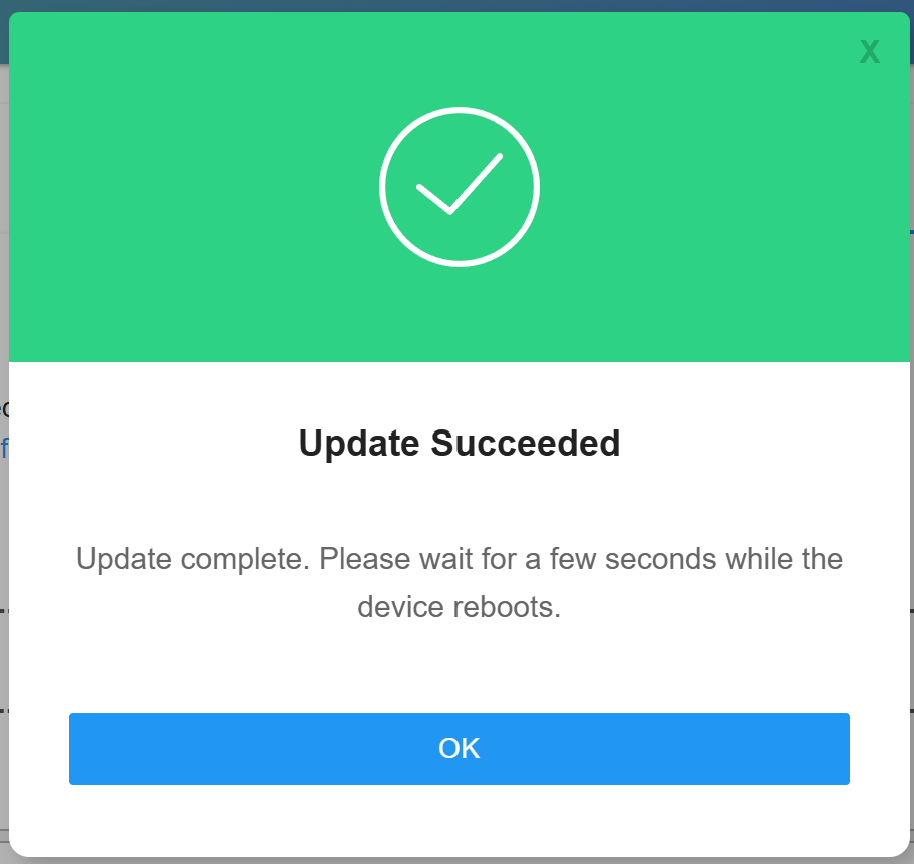
All you need to do on the Web UI is select "Update" on the righthand side, and then provide it the firmware file from that explorer window that popped up!
Got an error? Stop! Double check everything. Especially when updating several quads at the same time it can be easy to grab the wrong firmware file. The Web UI will double check the file you are giving it and will warn if it doesn't look right! Otherwise, it'll look like this:
Updating your Receiver
The process for configuring the Binding Phrase on the receiver is very similar, however of course you cannot just click a button to enter WiFi mode - instead, by default the receiver will enter WiFi mode if it cannot bind for 60 seconds.
I'll be updating a HappyModel EP1 next, so I can hit "Back" on ExpressLRS Configurator - and if you do, you'll notice that it has remembered your settings for most options, so the only thing you need to set if your device settings.
So this time I'll select "Wi-Fi" again for the Flashing Method. For "Device Category" I'll select "HappyModel 2.4 GHz" and for "Device" I'll select "HappyModel EP1/EP2 2.4GHz RX". Other than that, the process is much the same (but there's no LUA script to deal with).
Hit "Build" and if all goes well you'll get a new explorer window with your firmware file. This time it's a "firmware.bin.gz" file for the EP1. So at this point I'll connect my quad to my PC via USB so that it powers up, and wait 60 seconds for the receiver to enter WiFi mode.
It is important to ensure that your quad does not overheat, in particular your VTX! Powering on your quad on whilst it is stationary on the bench can easily lead to it overheating, and being permanently damaged! You can reduce the risk of this by disconnecting your VTX, disabling your VTX if it has a power switch, dropping its power down to a very low level (aka "Pit mode"), or by placing the quad on a high powered fan so that the components have adequate air flow.
After 60 seconds your receiver should enter WiFi mode automatically and you will see a new WiFi network called "ExpressLRS RX". The password is also "expresslrs". As before head to "Update" and provide it the new firmware file, and give it 40 seconds or so to upload and flash the new version.
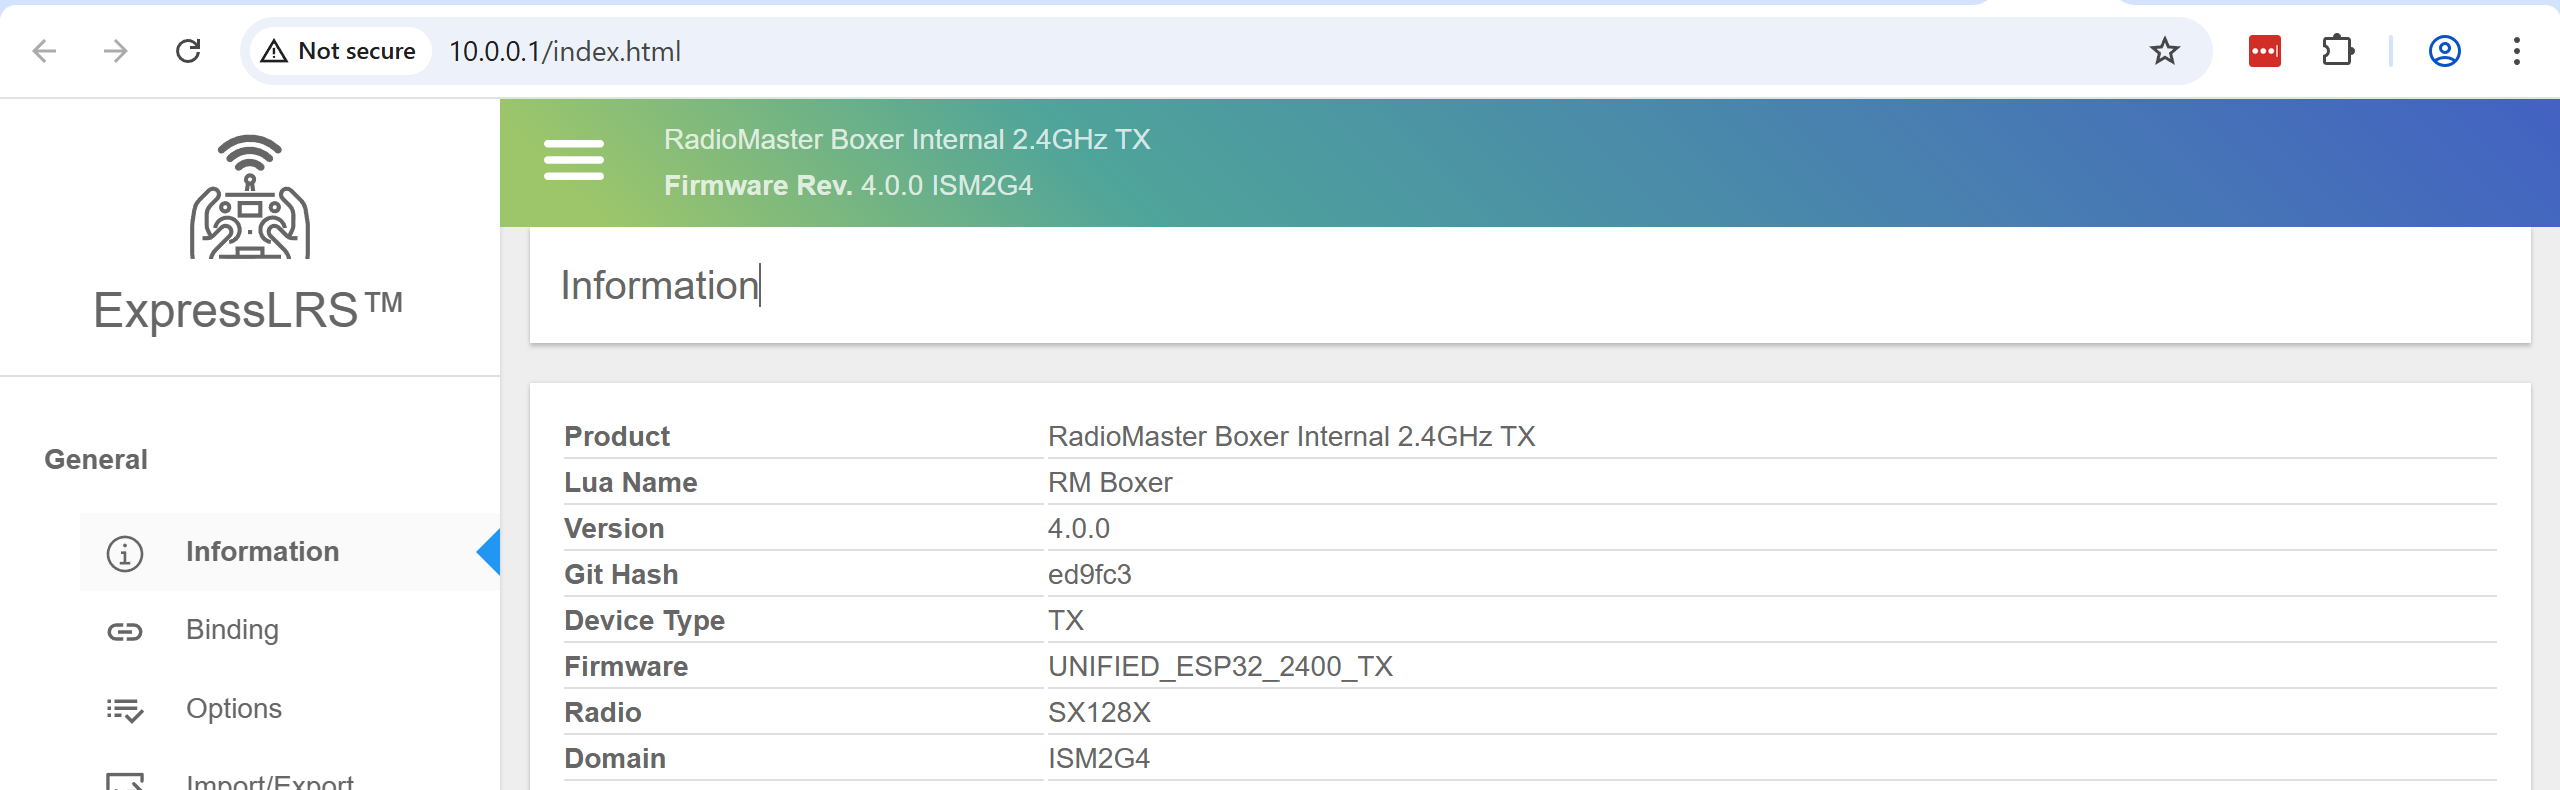
That's it! If both firmware files wrote to the TX/RX without error, you should be all good to go. If something doesn't seem right, then reconnect to each device over WiFi and check what it says for "Firmware Rev" on the front page. Remember both need to be on the same major version (e.g. 3.x or 4.x), both need to be on the same regulatory domain (LBT or ISM), and both need to be configured with the same binding phrase.
Oh, and 4.0.0 introduces a new and fancy looking Web UI. So if you've upgraded to 4.x, when you reconnect it should look like this: